Directions for making your own accurately sized apertures
Items that you’ll need:
- an appropriately sized quilting needle
- a pin vice
- a micrometer
- a cardboard drink coaster from a local eating establishment
- a magnifying device (for us older folks)
- a suitable pinhole material, the thinner the better
- extra fine sandpaper, I like to use 1000 or 1500 grit
- scissors
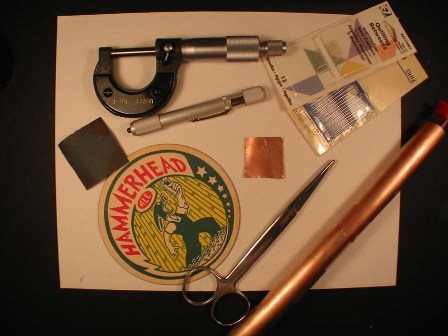
Gather all of your materials and use a clean, well lit area on which to work. Having everything at hand will make the job go smoother and be less frustrating.
Pinholes provide better image (more “sharp”, as it were) the more accurately “round” they are. Oval or out of round pinholes give blurry pictures, laser cut pinholes give sharper images due to their accurate shape. Matching an appropriately sized pinhole to a particular camera’s focal distance will yield the best, “sharpest” image. This is a convenient way to make your own pinholes that are fairly accurate in size and shape.
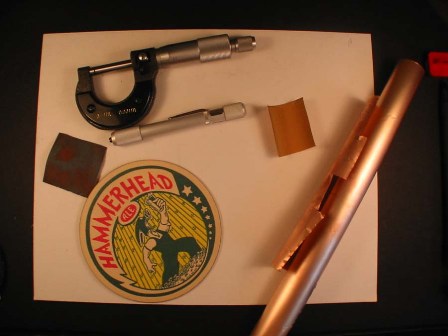
Lay out your pinhole material; the thinner the material, the better. A good hobby store should carry brass or stainless steel shim stock or you can use the aluminum from a beverage can. I have had consistently good results from .002 inch copper sheets that I bought years ago at an art supply store. Copper is soft, accepts the drilling process and sands well too. You’ll need to find an appropriately size for your pinhole; I have used several pinhole calculators available online. For this demonstration, I’ll make a pinhole that measures .0225″. That would be an appropriate size pinhole for a camera with a focal length of 190mm. Please note: I apologize for the mixing of metric and standard measurement, my micrometer measures in inches while I still measure most camera construction in metric. There are metric micrometers available for purchase.
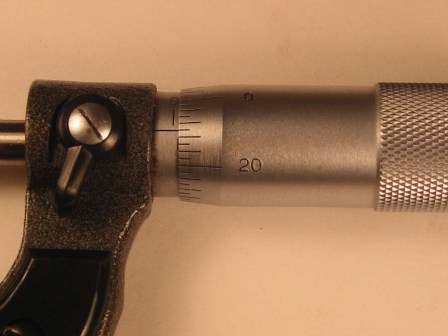
You’ll need to dial the desired number into your micrometer. There are several ways to learn to set up a micrometer. I learned how to use mine from the instructions that came with the tool, an online tutorial and from experience in working with it. I paid approximately $25 for my micrometer at a local hardware store. Simply put, each complete rotation of the barrel of the micrometer measures ¼ of 1/10 of an inch. The .0225 inches shown on the dial represents the same measurement that should be the diameter of my finished pinhole.
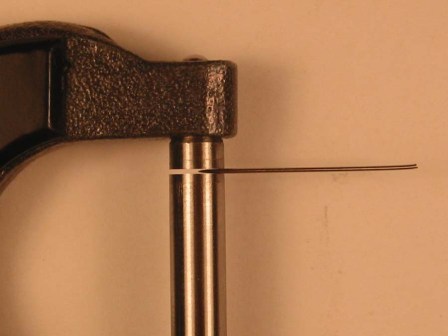
Take a quilting needle that won’t fit through the measuring rods when set to your pinhole size. A number 8 needle will do in this case; a number 8 needle should have a shaft size of .0240 inches. Place it gently-point first-into the measuring rods on the micrometer until it stops, don’t force it. When it does stop in the measuring rods, the diameter of the needle is .0225 inches, get it? Good!
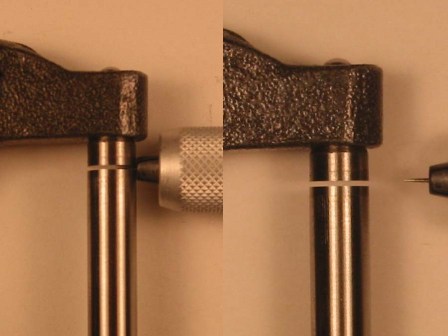
Bring the pin vice collets up over the other end of the needle and gently tighten the pin vice. By pushing the pin vice all the way up to the measuring rods on the micrometer and then securing the needle, you’ll end up with a needle sized to make a pinhole that is fairly close to .0225 inches in diameter.
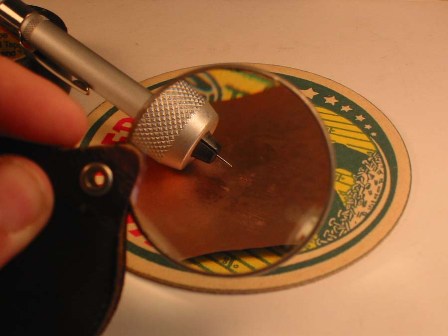
Now, to drill your own pinholes; patience is the key. The pin doesn’t “drill” through the material as much as it is pushed through and the rough, protruding edge on either side is smoothed off. Place the metal stock on the drink coaster and press down onto the material with the pin vice and needle while rotating the pin vice with your fingers. Push and spin the vice slightly until you have dimpled the material. Now, lightly sand the opposite side with the sandpaper.
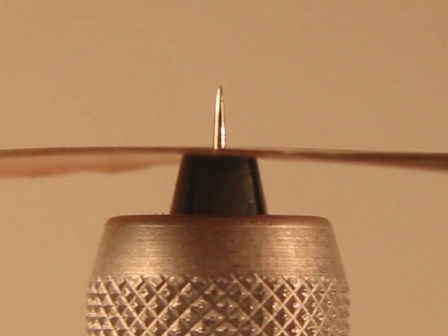
Repeat the process with the pin vice; spinning and pushing, flipping and sanding, until the pinhole enlarges slightly with each turn. Flip, sand and drill again until the pin vice collets are almost touching the metal sheet. Sand across the pinhole in different directions, slowly and with light pressure so as not to elongate your pinhole.
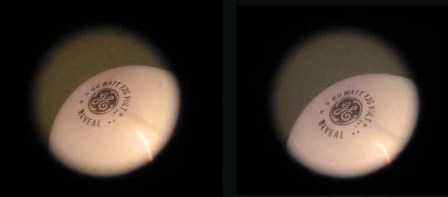
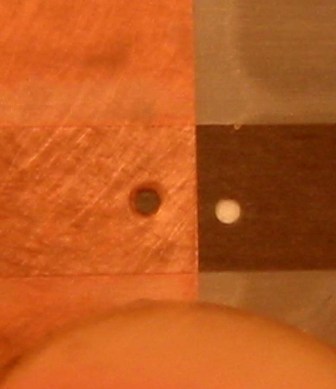
After repeating the process several times, the pinhole will be finished. Once again, patience is the key and you’ll have to use your own judgment as to when the material is sufficiently sanded and there is no more material that needs to be removed. This is a side-by-side comparison of a hand drilled pinhole that I made and laser drilled pinhole taken with a lensed, digital camera. The two images are fairly identical, the price of the pinhole being the only great difference. The laser pinhole is fairly costly and the hand drilled pinhole cost next to nothing to make, mostly your time and effort.
Good luck and good pinholing.
Comments
8 Responses to “Drill Your Own Precision Pinhole Apertures”
I’ve made several homemade pinholes based on different sets of instructions I’ve found on the web. The better ones do mention dimpling the metal and sanding flat on both sides to get a small round hole. What they don’t mention is a pin vice, micrometer, and never sandpaper with grit over 600! I’m lucky to have Japanese sandpaper at 1000 and 2000 grit. Great for this kind of job. One last point, if you can get stainless steel shim stock instead of brass or even worse copper, it would be better. Copper oxidizes very quickly!
I recently acquired an inexpensive set of mini drill bits and handle from Amazon, the smallest bit yielding about a 0.4mm hole, which is about right for 4×5 film, though I do have trouble getting such a small hair-thin bit properly positioned into the chuck of the pin vise. Also discovered a very inexpensive lighted scale loupe (in 0.1 mm increments) from JacksToolShed, which makes viewing the size and roundness of a hole much easier.
Look in hobby supply stores (like Hobby Lobby) for “beading needlesâ€. Also, you can get very fine sandpaper (like 1500 or 2000) at an Auto Supply store, especially one that sells paint and auto body work supplies.
I’ve also heard that some people have success with “blowing†a nice hole in foil with low DC voltage. Anyone familiar with this?
I’m going to try it with a 24 VDC 1000mA transformer on various thicknesses of material and see what happens. I’ll try the scanner method of sizing/inspection. The person who told me about it uses 12-15 volts and 2 Amps. (You alligator clip one wire to the foil and the other holds your needle. A quick touch of the needle point to the foil creates a short that makes the hole. (No sanding required?) We’ll see!
I’m not sure how I didn’t stumble across this site before. This is exactly what I’ve been looking for. Although I didn’t realize it was going to be so much work. Thanks!
What about this idea? Using a pointy drill bit like some bits used for glass, for example, drill into a block of something. The result is a cone drilled out of the material. To create the appropriate diameter aperture, simply sand down the point side until the desired aperture is achieved.
Perhaps easier and more useful would be to stack a bunch of thin shims and drill through them. Now you have a whole series of pinholes with different diameters.
I thought up the first idea in order to make a device that has a pinhole on one end, and a cone acting like a lens shade on the other. Blocking the extra light should help keep unwanted light out of the camera.
I find that drilling holes works better than using a pin. A miniature drill set and a Dremel tool work great. You still have to sand the back as there will be a burr. The thing about a drilled hole is that it will be very round.
You can use a drill bit set like found at: http://www.micromark.com/20-piece-Micro-Size-Drill-Bit-Set-with-Index-61-80,6758.html
It took me some time to figure a way to make pinholes that are on par with laser drilled. Every method I used looked awful under the microscope untill I heard a reference that advised submerging the pinhole in a little water with a spoon of washing soda. The result of using that with a micro drill bit was as perfect as a laser.
Tim,
Please explain the submerging the pinhole in water a little more. Do you drill while in the water and washing soda, just wet it before the drill or let it sit in it for some time?
Thanks a lot